Total Pageviews

Showing posts with label jewellery. Show all posts

Saturday, December 21, 2013

Enough With the Beaded Knitting Already!

I think I might now be a bit sick of working through Betsy Beads, fun as it has been.  I'm not too pleased with my latest effort - my fault, not the instructions or anything - and I want to move on to something else.  But I heartily recommend the book as it is chock full of fun things to try and good instructions.

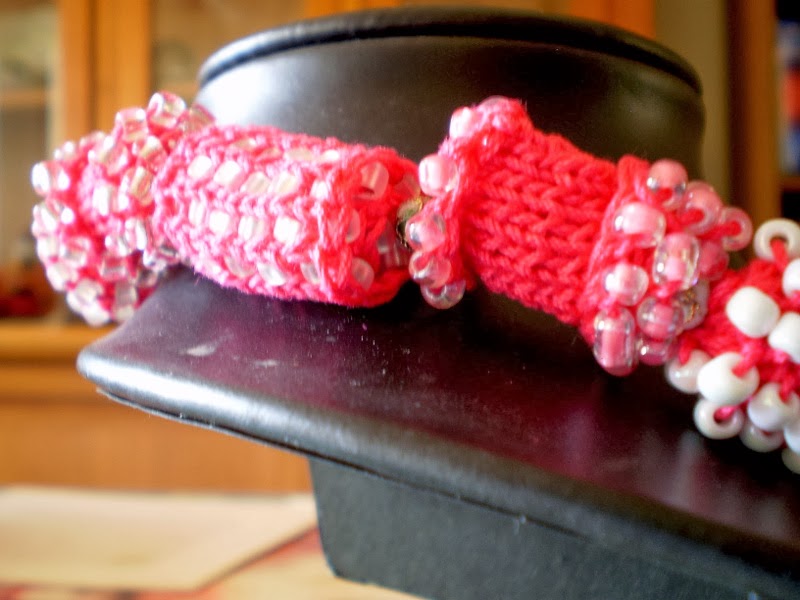
This time I made a gathered beaded bracelet.  I think I twisted it accidentally at the end and I'm not wild about the way it looks, and unpicking the relevant bits don't really interest me.  It may be usable in another craft piece at some point in the future - nothing need be wasted.

This is lace weight cotton and size 8 beads.


I do actually have a major piece of beaded knitting still lined up, but not like this.  I want to do a shawl which will have some beads added to it using the crochet hook method.  But I don't want to start that for a couple of weeks as it's a biggish project and I don't want the distraction of Christmas and a possible holiday afterwards to get in the way.

And now for something completely different.

Just to prove that even big kids like construction toys:


'I was tidying up upstairs and I got distracted.'

And we have pigeons nesting in the passionfruit vine directly the side of our patio.  It is rather cute watching the little baby pigeons get bigger.  I took this photo a week ago and they are bigger already.  The mum is very devoted.


Owing to complicated family issues, Christmas is still slightly up in the air, though I am still intending that we will spend it with George's sisters-in-law and the children that are currently in Australia.  It will the first Christmas without their mum and that will not be too easy.

George and I are hoping to go to Adelaide for a week after Christmas, but again family circumstances make it a bit hard to gauge whether we can actually go or not.  Nothing is booked yet (except for a dinner date in Glenelg on December 28th!).

Sunday, December 15, 2013

Knitted Beaded Beads

More experiments inspired by Betsy Beads - I'm getting my money's worth from this book!

I made knitted beaded beads for this necklace, using instructions from the book.  Although there are several different types of beaded beads in the book, I essentially ended up using only three - rolled, beaded-end soft bead; rolled, knit-side-out soft bead; and rolled, purl-side-out soft bead. There is a cloisonne bead in between each knitted bead, alternating white and black.  I experimented with some others - there is one slightly larger rolled bead but I decided they used too many beads, considering that I had a limited selection of size 6 seed beads of appropriate colour ways to make this necklace look coherent. (Like the last necklace, this is made using 4ply cotton and size 6 seed beads).  I had a go at knitting bead covers for large round beads but couldn't make them look neat enough - I will have another go at that at some stage but there are other techniques in the book that I want to play with, so I don't know when I will go back to them.


This is an example of a rolled, purl-side-out soft beads.


On the left is a rolled, knit-side-out soft bead, and on the right is a rolled, beaded-end soft bead. And you can see one of the cloisonne beads.


And I hope to wear it tomorrow with a plain black Tshirt and the upcycled skirt from the last post.

Wednesday, December 11, 2013

Beaded Knitting Necklace, Dog Bed and Refashioning

I have actually accomplished a couple of things in the last week or so.

I am trying various things from the book Betsy Beads by Betsy Hershberg, as mentioned in a previous post about knitting necklaces.  This is the only thing I have completed so far, as now I am knitting a pile of beads to string together, and they are time-consuming.  This is knitted with 4 ply pink cotton and size 6 seed beads, in a purl I-cord (as opposed to the more 'normal' knit I-cord).  According to the book, doing I-cord in purl forces it to spiral.  My tension obviously isn't tight enough, even though I am using tiny needles (something like 1.5mm, can't remember exactly) with the cotton.  It did spiral a bit, but I still have to twist it a few times to produce the desired spirally look when I wear the necklace.  I didn't do a great job of attaching the magnetic clasp, sadly, though that doesn't show so much when you are wearing it, but it looks nice on and I am quite pleased with it.  Pictures of the knitted beads to come, eventually.


I've been meaning to make Sirius a new dog bed for ages, having bought this cheerful polar fleece some months ago.  She eats her beds, and I don't resent it when it's polar fleece, which is cheap, so I make her one every couple of years.  This is bigger than the previous ones, and it's a bit like a nest.


I think she likes it!  She likes to have a bed under my sewing table in the family room, even though she can't use it when I am actually sewing.


I also did a ridiculously easy refashioning project.  I was culling my wardrobe recently and picked a few summer dresses to donate to op shops.  This one was in that pile, but I realised that I really liked the fabric, and I was only ditching the dress because the top fitted badly (it either rode up, making me look heavily pregnant, or pulled down, which exposed half my bra).   So...


 Quick chop of skirt from bodice, and removal of a couple of inches of it to tidy it up and make it above ankle length rather than scraping the ground.  Pictured with trusty scissors and the roll of black elastic that will provide a waistband.


A quick pin, a careful zig-zag, and a skirt, voila!!


Tuesday, November 26, 2013

Knitted Armour?

When I was at the Fibre Forum in Geelong I was fascinated by some knitted necklaces that a couple of people were wearing, in a variety of colours and textures and lengths.  It turned out that they weren't I-cord (French knitting) as I thought they were, but simple narrow strips of stocking stitch which curled over on itself.  They had got the pattern from Dairing, a specialist yarn supplier in Melbourne - though 'recipe' would be a better word.  As it happened, Dairing were one of the suppliers selling stuff at the Forum and, although I had been told how to do it and variations that could be done and could have done it myself, I bought a kit from them containing several patterns, a cone of bronze metallic yarn, a cone of silver metallic yarn and a cone of  'yarn' that was a narrow ribbon of reflective tape (like the sort of thing you find on backpacks and cycling gear).

Basically you cast on 8 stitches and knit in stocking stitch until it is long enough for your purposes.  You can knit with one strand of yarn or as many as you wish - change needle sizes to make it tigh or loose, from necklace to necklace or within the same piece - use beads if you wish - and I'm sure there are LOTS more variations that I haven't explored yet. I've so far only used to yarns that came with the kit but I want to experiment with others now.


 This is actually a photo of the necklace below, but I used the flash and it really shows the reflective yarn!


This is the reflective and the silver yarn, heavily beaded with chunky bronze and silver coloured beads - they were actually a mixed bag of spacers.


This is both metallic yarns, knitted on two different sizes of needles to give textural differences between sections.


This is bronze with bronze bicorn beads.


This is all three yarns with the same spacer beads as a couple of pictures above.


And this is all three yarns together on big needles.

It proves to be VERY hard to photograph metallic yarns :(  Sorry that these don't show up very well.

They were fun to make.  I have a book to read called Betsy Beads : Confessions of a Left-Brained Knitter by Betsy Hershberg, which I bought before seeing the pieces at Geelong, which is about very similar things.  I even bought some knitting/crochet cotton and beads to go with them when I bought the book, and I am going to explore that now.

Oh yes, the post is called Knitted Armour because the other piece I have done, which isn't in this post, looks a bit like knitted chainmail.  It needs a chain applied to it which I haven't done yet, so I will photograph and post that one when it's done.

Friday, October 11, 2013

Sublimation Printing - TAFTA Geelong Fibre Forum

Last week I spent a fantastic week at Geelong Grammar attending my first ever TAFTA Fibre Forum, and I'll post pictures of what I have been making over two or three blog posts.

I did a workshop with Melbourne jeweller Anna Davern studying sublimation printing onto metal.  It also involved quite a lot of basic metalwork techniques for those who needed it, i.e. especially me!

Sublimation printing = 'Design your graphics in your computer and or scan the image into your computer. When you get ready to print the image be sure to "flip or mirror image" the image so it will be a transfer. If you will design a hairline rectangular border 1/8 inch larger than your metal plate you wish to print and center all your graphics inside that border; it will help you center the graphics on the plate when you are ready to print. You will be printing the "border" with your graphics centered in the border.
It will take approximately 15 minutes for your heat press to get to printing temperature so turn it on ahead of time. Set the temperature to 350° to 360°F. This temperature is important. Any setting under 340° may cause the toner to stick too tightly to the metal and may cause gray printing. Any setting over 370° may cause the toner to "bleed" and the edges of your characters may be slightly distorted.
Remove the plastic protective covering from the metal plate. Preheat the bottom pad of your heat press for 5 or 6 seconds by closing the heat press without anything in it. Now lay your transfer "ink side up" on the warm pad of the heat press. This will pre-shrink the paper prior to printing. This will keep the image from blurring during the printing process. Center your cut metal plate inside the hairline rectangle you designed on your computer. Pull the handle of your heat press down until it locks in place. This process does not require heavy pressure. Set the timer for 20-25 seconds.
When the timer goes off, open the heat press. Immediately, while the metal is still in the heat press, separate the paper from the metal plate. The best way to do this is to pick up one edge of the paper and quickly turn the paper and the metal plate upside down. You will find the metal and the paper are stuck together. With your other hand (with a clean glove on or a clean heavy cloth wrapped around your finger) hold the metal plate down and pull the paper away from the metal. Do this quickly; you have a window of only a few seconds to separate the metal and the paper. Do not move your finger around on the metal as you may pick up some toner on your glove and double print the metal where the glove touches the metal the second time.
Now remove the metal from the heat press and lay in down on some object (that is heat resistant) to cool down.'  It's too complicated for me to explain in my own words, so I borrowed some from here, an American site called Sublimation TOG LLC - there are also Australian firms which sell the stuff.  

Will talk more about the process in other posts but now I want to put some piccies in:

The square pieces have been printed with an image or images, and sometimes overprinted with other images,, and then have had another printed piece/s glued directly to them (with superglue).  They are going into the mixed media stash and will be used in various ways.  If I ever use them, I'll post photos of the finished works!


The smaller blanks have all been printed with one image on each and mostly turned into brooches, except of course for the obvious pair of earrings that I made to match one of the brooches.


Thursday, December 01, 2011

My Creative Space

I am still experimenting with buttons.  i am was just about to give the whole thing away because I was getting frustrated with the scale, and I don't think these will take over from my other things in the long run, but I have gained some terrific ideas along the way.  They are all button brooches, so they look like buttons from the front but have a brooch back on, er, the back.


Ok, so this is, obviously, not a button, nor a brooch.  It is a cake.  Not even a cunningly fabricated textile cake meant to worn on something (a hat maybe).  It is a Stephanie Alexander chocolate cake and you can tell by the amount left over how disgusting it tasted.  This was a whole 24 hours after making it!


This is a brooch with seeds beads embroidered on silk dupion.  It is not a cake.


Ceci n'est pas une gateau.  It is a mass of French knots on silk dupion.  You may have seen it already before it became a brooch.


Yeah, I showed this one before too, it's cross stitch in variegated thread.  On silk dupion. 


This is silk dupion decorated with a scrap of sari silk from The Thread Studio.  Lovely Dale sent me a baggie of sari silk scraps when I won a Facebook giveaway.  I promised I would use them on something.


And this is a cake. 


This is one of the buttons I bought at the button fair I blogged about a while ago.  I have a whole card of these, the original card, which I am going to keep if I ever use all the buttons.  They are immediately post-war Parisian.  The fact that I had matching embroidery thread in the pile by my chair was a complete co-incidence!

(Actually, the blue thing isn't really a cake).

For more creative spaces pop over here.  There might even be cake but don't blame me if there isn't!

Friday, November 18, 2011

My Creative Space

I needed a good long rest after Blogtoberfest!!  I have been slowly knitting away at the green cardigan I showed a couple of weeks ago, and reading, and watching telly.  Oh, and working.  Eugh.


The makings

What is this?  A staple gun.  A pile of vintage lace.  A square artist canvas covered with quilting fabric.  (Badly.  The front looks OK, but you should see the mess I made of the back!  Or rather, you aren't going to see!!)  I bought the staple gun but the rest comes from the stash.  I have been collecting bits of lace for yonks, and the fabric covered canvas dates from TAFE days when it was going to be used for something but wasn't ultimately.

After much use of staple gun

After much stapling. Some of the lace isn't dead straight, but you will see in the next picture that doesn't matter too much. My dog doesn't like the sound of the staple gun, apparently :(
A new earring display

A new display thing for my earrings!  (Err, some of my earrings.  You can't see the three necklace boxes full of studs and non-hook hanging ones).

Not an original idea.  I saw a similar thing on Pinterest, using an empty frame with lace across, but I didn't have a suitable frame, and I did have the canvas, and I am trying to shop from my stash when possible these days.

More lip-smacking Creative Spaces here

Tuesday, June 21, 2011

Me-Made-June Week 3

Another chilly week.  But not quite as bad as last week!  It did however start with a scarf.


This is knitted from Lincraft Prism and is 70% wool and 30% soysilk.  The pattern is from Knitted Shawls, Stoles and Scarves by Nancie Wiseman and it can be knitted either as a shawl (my MIL has a lovely pink and purple one) or a scarf.


I had to get my favorite glass brooch in somewhere this month!


Then it was a wet day and I had to catch the tram to work, which means walking through a park (which is pretty at sunrise, but gives you wet feet), and so I wore waterproof shoes and carried office shoes in the felted bag I made for Me-Made-May. 


This brooch, made some years ago, sits on the lapel of a designer denim blazer that I bought in an op shop about the same time that I made the brooch. 


A cold Sunday meant hand knitted socks.  These are Jaywalkers knitted in a mixture of wool and cotton.


I've worn very little of my own jewellery this month, mostly because I have had the perfect opportunity to wear the handknits!!  But I did wear these green and blue coralled earrings.


And finally, as Arctic blasts assailed Melbourne, I wore my Fetchings, knitted from the same Prism yarn as the scarf at the start of this post.

I haven't been doing My Creative Spaces for the last couple of weeks, because of the planning and photographing, etc, of Me-Made-June.  but I am going to this week, because I am participating in a KAL (Knit-along, for those who are wondering) and I want to show some progress pictures, and it's pretty much what I have been working on all week.