Total Pageviews

Showing posts with label painting. Show all posts

Monday, July 29, 2013

Stuff


I had a little epiphany while we were on holiday.  I decided that I would resume an 'artistic practice' of some sort when we returned home.  One with no pressure, no deadlines, no concerns about saleability.  Just for my own pleasure and mental health. George was delighted with the idea. (There is also a project coming up which I anticipate will take one or two days a week for about a year, not artistic in the same sense but sort of literary/historic, but more of that in another post).

Well, I've only done only thing from scratch in the three weeks since we returned, as I have had catching up to do with a variety of things. (Including taking Wombat to the movies twice a week, for three weeks, to catch up with the lost time while we were away.  I usually take him once a week, and it is a ritual we both have come to value greatly).

I had so much fun with my dot painting workshop in Uluru that I wanted to do more dot painting, but not in a traditional way.  I wanted to put my own stamp on the technique, and besides, it would be inappropriate in any way for a white British person to use the symbols sacred to another race.

This is my first pass through of the various ideas I have had.  I took a dark turquoise paint and gradually mixed it with white to do the various shapes on the small canvas, and then just used gold paint to do dots on the borders of the shapes.  It was sort of inspired by quilting in the ditch in patchwork, I suppose, if you imagine it done with beads.

It's far from brilliant, but it was fun, and it made me get my paints out and actually DO something without caring whether anyone else liked it or not.  I have other ideas which will be experimented with in due course.


This next piece is something I actually made during the summer and finished well before we went away, but left it in a crumpled heap until a couple of days ago.  When I decided to block it, I was annoyed to discover a nibbled hole in the exact centre.  I don't know what ate it - we don't seem to have mice and we pest bomb the house every few months because we have a slight cockroach problem (most people in our area with lush gardens seem to have one, so I don't think we are unusually grotty) - but I had to brush up my long-neglected darning skills to cure the problem.  It's far from invisible, sadly, but I will still wear it.

The pattern is Bigger on the Inside, modified to get rid of the lace body because I couldn't be bothered knitting lace and I really only wanted it for the Tardises.  I also added an iridescent blue bead for the light on top of the Tardis instead of the stitch pattern.  I did have a go at the lace pattern but it was irritating me, and I wanted it to be a fun knit.  I am not very fond of knitting lace.  I knitted it with Shepherd Baby Wool Merino, 4ply, which is quite soft and nice.  It's a short shawl, which I like, more like a deep scarf.


Films I have seen since coming back from holiday - 

Word War Z - better than I expected. It inspired me to buy the book after several people told me the book is far better than the film.

Despicable Me 2 - bottom!!!!

Man of Steel - disappointing.  OK but not great.

Monsters University - really funny and enjoyable, and I loved the huge, colourful diversity of monsters.  And it had one of the BEST librarian jokes ever.  (Mostly visual, so not really worth describing).

The Lone Ranger - a bit too long but entertaining.  Johhny Depp is to be admired for keeping such a straight face for the whole film.

Tomorrow is The Wolverine, not sure about that...


Edited to add : Roxie left me a lovely comment this morning but I wasn't wearing my glasses at the time and I managed to delete it.  So here it is, copied and pasted from the trash folder in my emails!

Love the painting. And yes, by all means, wear the scarf. It's beautiful and real! If you want something made with machine-like precision, get something machine made. I prefer things showing the touch of the maker's hand. 


Thursday, October 07, 2010

Wayland's Smithy


Wayland's Smithy is a Neolithic long barrow in Oxfordshire near the White Horse of Uffington.  Wayland was supposedly a smith (blacksmith) Germanic god.  Handy to have in the days of horses, presumably.  I guess his modern equivalent would be a motor mechanic god!

Legend had it that if your horse lost its shoe and you left a silver coin at the site, in the morning your horse would be reshod.  Presumably the franchise for that was passed down through the generations!  With a renewed interest in things Druidical and whatnot over the last 150 years or so, apparently some people leave votive offerings there once more.

The day I visited Wayland's Smithy, a hot summers day in, I think, 1990, it was occupied by a group of layabouts drinking beer.  It retained some of its magical feel, however.  The whole area is said to be riddled with ley lines.
Posted by Picasa

Wednesday, June 23, 2010

Creative Tuesday


I blogged briefly about these pictures when I did them on my Diploma course, almost exactly two years ago. At the time I had intended doing more using the same techniques, but of course I didn't.

I have periodically taken photos of old buildings in my travels, still with that intention. Yesterday in Ballarat I took some more. And, thinking about it, it is still a good idea, to do more of these. So maybe I will.

They are very easy, even for someone who is as completely a duffer at drawing as I am. Take a photo (if you are going to sell them, onviously a copyright free photo!). Copy it in black and white, or greyscale, or whatever, aiming for enough contrast to be able to see major features through tracing paper. Trace said major features. Scribble all over the back, heavily, with a soft graphite pencil. Transfer to watercolour paper using a pencil or whatever you wish, but try not to press too hard as it is best not to have the scored lines on the page. When the bones of the picture are transferred, use the photocopy as a guide to go over the transferred lines, and add as many extra details as you wish, with a WATERPROOF fine line pen.

When you are happy with the sketch, and it has all the details you want in it, choose two colours of watercolour paint - complementary, analagous, warm, cold, whatever takes your fancy. We used a slightly different technique in each of the above pictures. In either case, wet the paper with clean water. (See why you need to use a waterproof fine liner!) Then either apply gentle blobs of colour and let them spread as they wish; or do the same and hold it vertically while they drip and dribble.

OF course you could use more than two colours. Or find other ways of colour washing the pictures. Whatever. I like these pictures. And of course you don't have to use old buildings, you could use the same technique with anything at all.
Posted by Picasa

Thursday, April 29, 2010

Friday Update


Painted papers. I will be tearing and collaging these to make two-sided ... bookmarks, maybe, depending on how I feel about them at the time when I have done collaging and whatever. I was really pleased with these papers until the final layer. I just didn't know when to stop, did I! I had never used iridescence medium before and thought I would be clever and water it down and sponge it all over the papers. Well, it doesn't look very iridescent, more spotty. But the collages are going to be sealed with Mod Podge and glitter and hopefully that will be less noticeable by then.

These were great fun to make, just adding layers of shapes and squiggles with drying periods in between, using ordinary acrylic paints. I would like to do similar things with inks and watercolours too. Watch this space.

It was a short week, being away over the long weekend, and I am very pleased to have achieved anything creative.

I have also been working my way through some more cookbooks. This time, a handful of the vast number of tiny ones I have - you know the A5 format that you either buy for a few dollars or are given away with magazines. I have picked some recipes and will blog about them as I do them.

I hope to spend next week collaging.
Posted by Picasa

Tuesday, June 10, 2008

I Can't Draw


When I started at Box Hill 2 1/2 years ago I most definitely could not draw. I still can't, in the sense of looking at something interesting andproducing a good likeness of it. But the incomparable Colin Johnson has taught me techniques that have enabled me to produce the occasional almost Ok piece like these two. It will never be one of my strong points but I am quite pleased with these.
Posted by Picasa

Thursday, May 31, 2007

Hundertwasser


This was an interesting exercise we did in class over the past couple of weeks.
1) We studied the Hundertwasser picture The Houses are Hanging Underneath the Meadows and analysed it in terms of design - colour, balance, repetition, motifs, etc. We were also asked to think about in terms of maps (an obsession of our current teacher, but a worthy one for this exercise).
2) We were told to produce a series of coloured papers using inks and oil pastels in various ways (there was a list of about six or eight ideas of what to do with them - including painting ink of wet paper, doing pastel rubbings and then inking over, etc.
3) We were each given a photocopied portion of a Melbourne street map and told to design something based on our study of the Hundertwasser piece, using all or a portion of the map to create the design.
4) Then we used the papers we had created to produce a collage based on our design. We were allowed to add small bits of extra drawing on top - I drew grass with green oil pastel on top of the centre section of mine, and then outlined it with black texta to make it show up better. (This was when I discovered that fine line pen, which is my favorite, doesn't work on top of oil pastel - derr!!)
5) The next week we had to produce coloured cloths to recreate (approximately) the paper collage, using fabric paints, fabric crayons and transfer dyes and crayons. I have never had much luck with transfer dyes (I know others who swear by them, though) and got rather frustrated trying to get the right magenta for the right hand section of my piece, giving up in the end and settling for the more red-pink which was all I could mix with the available fabric dyes. I still liked the ultimate effect.
6) Then it was just a case of vliesofixing the relevant bits of fabric down and doing some stitching. The funny thing is, in class I was saying that I was going to do hand stitching only, and resist my usual urge to put beads on everything, and how I had sworn off machine embroidery - and look what I did, machine stitch and beads!!
Ultimately I am pleased with this piece. It may not be great art but it was an excellent example of structuring a series of classes (which is what we are actually studying at the moment, Strategies for the Artist/Teacher, doing a textile piece was just a bonus way of demonstrating the process to us!) and I enjoyed the process.

Posted by Picasa

Tuesday, October 31, 2006

Series of Three (T is for Three)

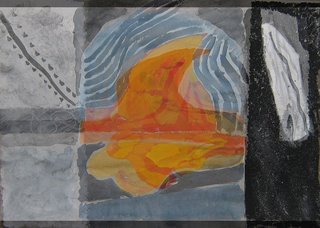
These were hard to photograph. They are fragments inspired by the watercolour paintings of several entries ago. Each one is painted on watercolour paper and then machine stitched. It was a technique that I had wantd to try out though I don't know that it will do it too frequently - I quite liked the effect but I don't think it is destined to become a favorite. Posted by Picasa

Edited much later to add that I am going to try some layering with organza and more stitching and embellishment to soften these pictures up - next year sometime!

Monday, October 23, 2006

My first forays into watercolours


We had to do collages and then turn them into watercolours in class recently. I can't paint, and I had never used watercolours before. The collaging process was fun though. I ended up doing two.

Just for fun, I collaged them together on Picasa. I like the result. (It's the top picture).

There will be three small stitched pieces coming from this - we had to choose three postcard sized sections to turn into stitch. I haven't finished mine yet but had better get a move in as everything is due in on November 3rd!

Thursday, September 07, 2006

P is for Pear 3

The pear is made from Tyvek. I painted a sheet of it with bronze acrylic paint, then ironed the whole sheet and cut out a pear shape from it. This was stuck down and hand stitched around onto the background. The background was prepared from crumbpled up brown paper, roughly smoothed out again, and Vliesofix that i had painted with acrylics and, when it was dry, ironed onto the brown paper. I then machined lines onto it to give (I hope!) an impression of a table and a wall behind. Posted by Picasa